Ingredients
Equipment
Method
Preparation:
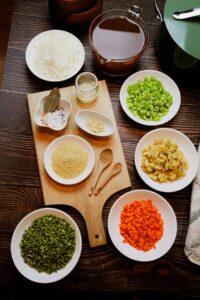
- Dice onion, celery, and carrots. Place them on a plate and set aside.
- Mince garlic. Set aside
- Dice potatoes (no need to peel). Set aside.
- Juice lemon. Set aside.
- Measure out all of the dry spices. Combine and set aside.
- Measure out split green peas. Rinse thoroughly, and set aside.
Instructions:
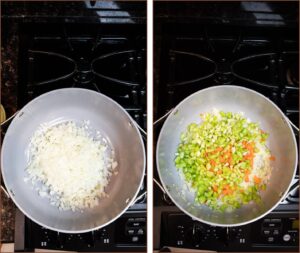
- Heat 1/4 cup of water in a large pot on medium-high heat. Add onions and water sauté for several minutes.NOTE: You will need to add water, a little bit at a time while cooking the onions and the rest of the vegetables, to prevent sticking.
- Add the celery and carrots to the pot and continue to cook until the vegetables are just beginning to get tender, adding more water as needed.
- Add the minced garlic and cook for one minute stirring continually to prevent burning.
- Add all of the dry seasonings to the sautéed vegetables and stir to combine, making sure the seasonings do not burn.
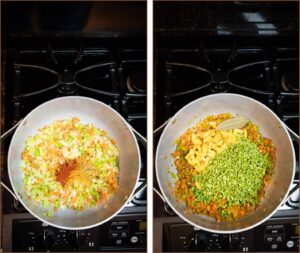
- Add the vegetable broth, split peas, and potatoes. Stir to combine.
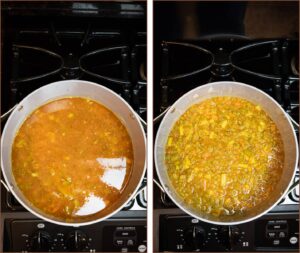
- Bring the soup to a boil, cover, and reduce heat to a simmer for approximately 45-50 minutes, or until the peas and potatoes are very soft.
- Once fully cooked, turn off the stove and remove the bay leaf from the soup.
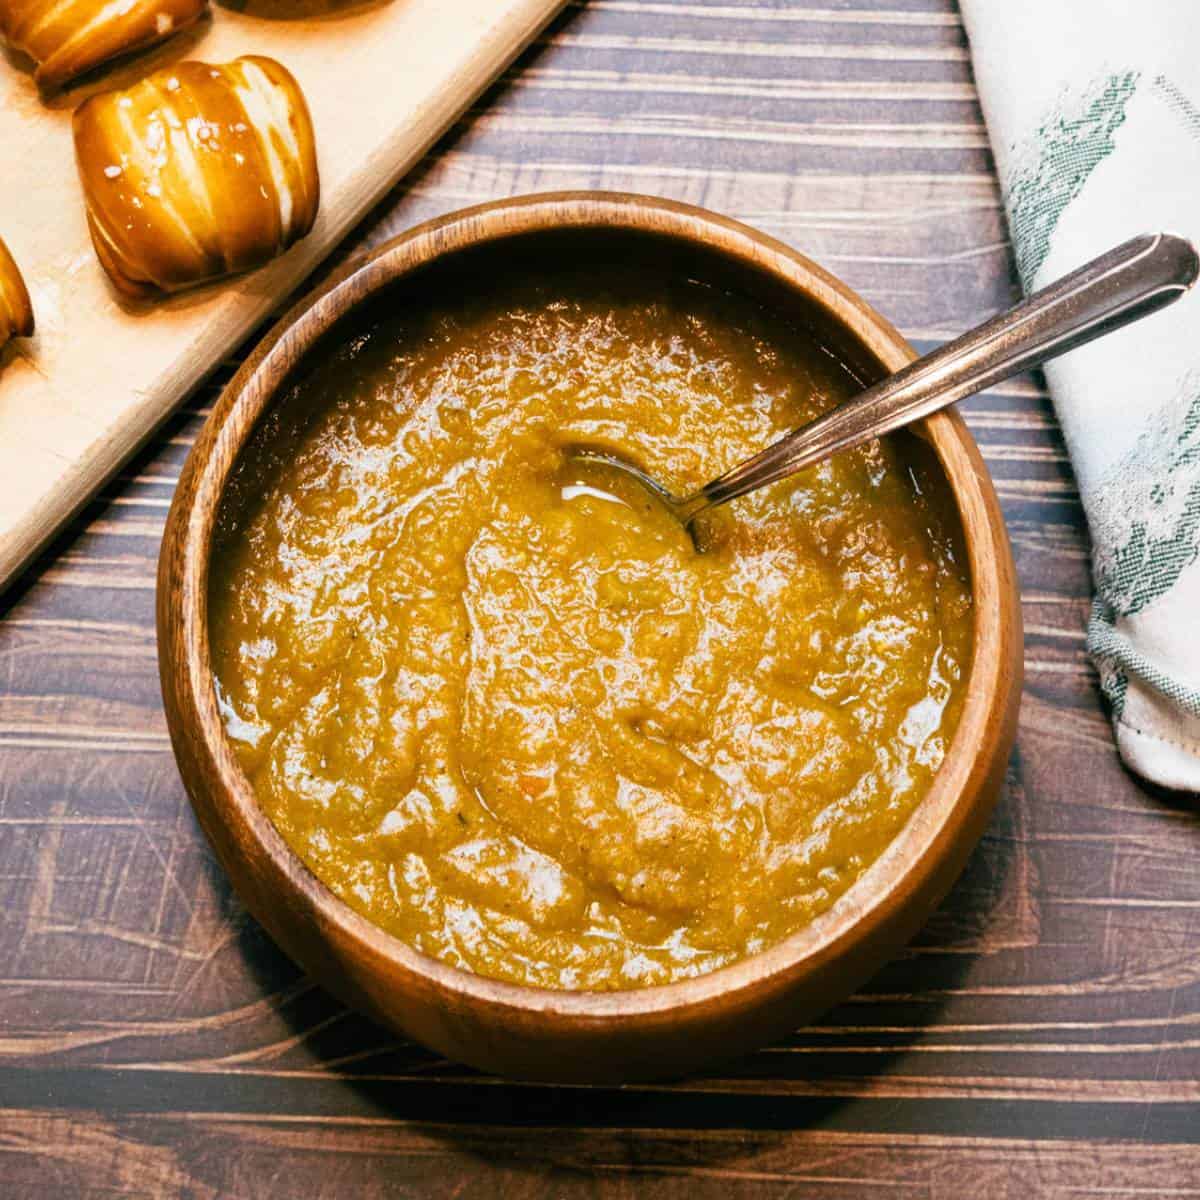
- Using an immersion blender, or a food processor, puree the soup to your desired consistency.NOTE: Blend fully to a puree, or you can leave it chunky for added texture.

- If you've used a food processor, pour the soup back into the pot and add lemon juice and nutritional yeast according to your taste preferences.Add additional salt and pepper if desired. ENJOY!
Nutrition
Notes
Recipe Notes:
- Fully rinse. Make sure to fully rinse the split peas before using them.
- No soaking. The split peas do not need to be soaked before cooking.
- Vegetable broth. Feel free to use water with vegetable bouillon or, if you do not have any vegetable broth on hand, you can use water instead. Note that this will create slightly less depth of flavor but still flavorful.
- Veggie swaps. Sometimes carrots make recipes too sweet for my taste. In this recipe, feel free to swap out the carrots for one medium red bell pepper. It too tastes delicious!
- Heat sensitive. Feel free to leave out the crushed red pepper chili flakes if your taste buds are heat-sensitive.
- Nutritional yeast. The nutritional yeast is optional but I love using it to give this soup a slight cheesy flavor. Plus nutritional yeast is a great source of B vitamins.
- Blending. If you want to blend this soup entirely to make it perfectly smooth and creamy, that is your prerogative. Sometimes I also like to blend only about half of the soup, and then leave the rest in chunks. This gives the soup a beautiful smooth and creamy texture. Try it both ways and see what you like!
- Glass container. It is best to store this soup in a glass container that has a tightly sealed lid, such as a mason jar or Tupperware container.
- Fridge. This anti-inflammatory soup will last in the fridge for approximately 3-5 days.
- Freezer. For longer storage, you can place this soup in the freezer, in a freezer-safe container. It will last in the freezer for up to 6 months.
- Defrosting. When you are ready to eat the soup, take it out of the freezer and place it in the fridge for a few hours to thaw, before heating it to serve.
- ProTip 1. Make sure your soup has cooled sufficiently before placing a lid on your container and storing it in the fridge or freezer.
- ProTip 2. If you are storing your anti-inflammatory soup in the freezer, do not fill the soup to the tip-top of your container. The soup will expand when it is in the freezer and could potentially crack your container.