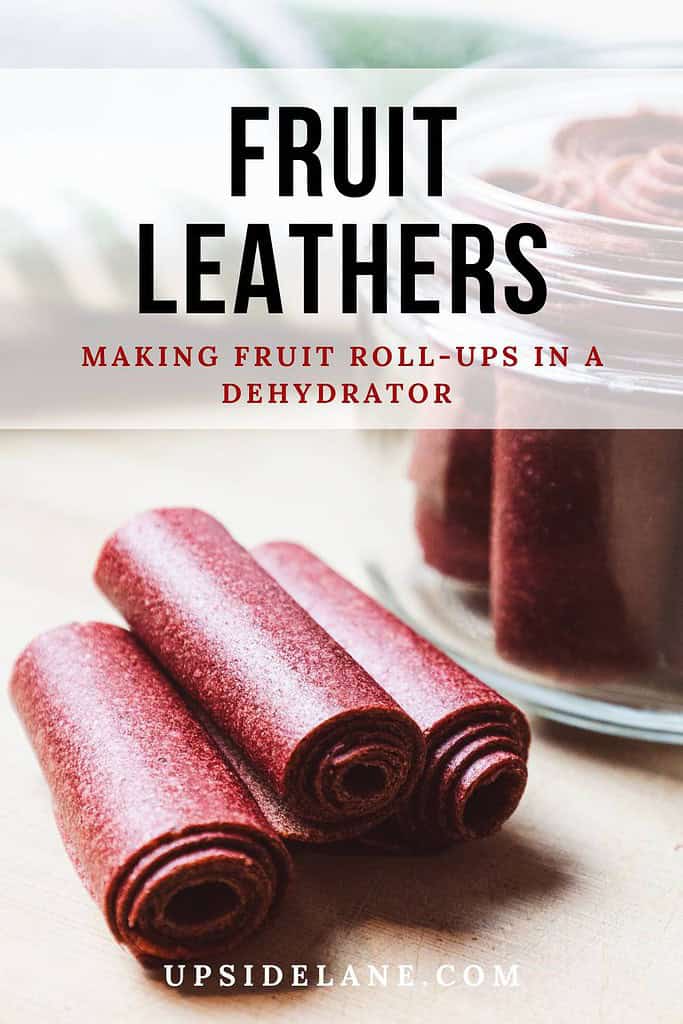
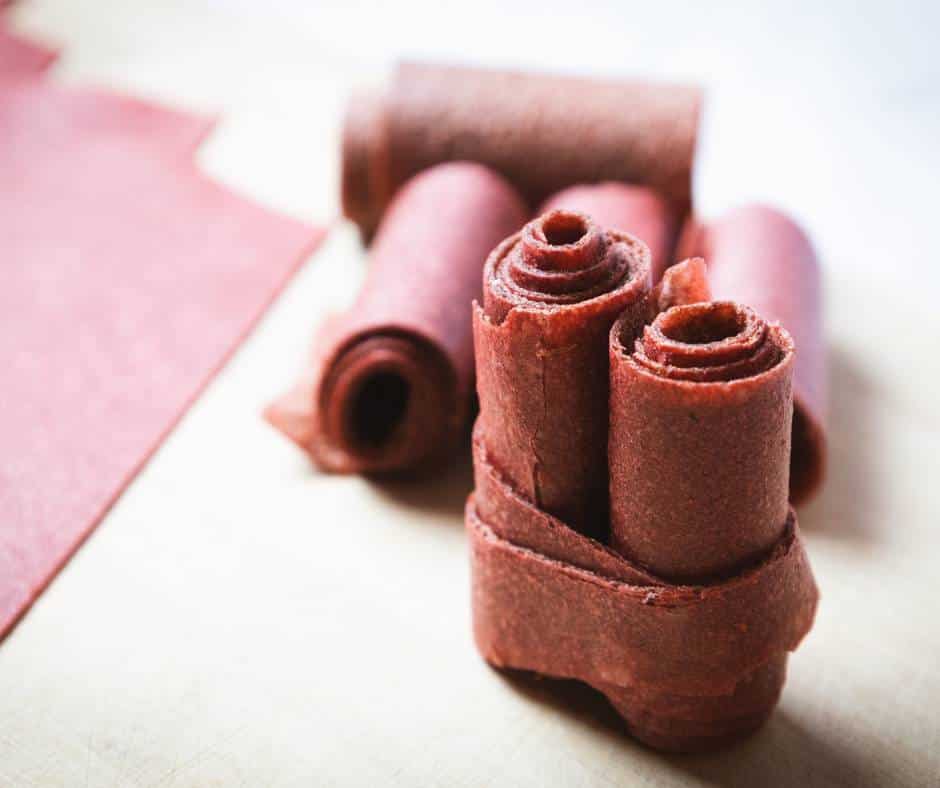
Fruit Leathers: Making Fruit Roll-Ups In A Dehydrator
Making fruit leathers is simpler than you might expect. They are a tasty way to enjoy fruit and a healthy snack for kids and adults alike.

Make your own delicious, healthy fruit leathers with just a few simple steps. These chewy, all-natural treats are a breeze to make in your dehydrator and perfect for snacking on the go.
My son just went off to graduate school, back to living in a dorm with virtually no time to cook. So I’ve been working on making creative healthy snacks for him to eat while on the run, and these homemade fruit roll-ups were a success!
I wish I had known how easy it is to make dry fruit leathers because I would have been making them years ago when all three of my children were still young and growing up at home.
Fruit leathers are a chewy, sweet treat loved by many, however, most dry fruit leathers in the grocery store are filled with added sugar and other low-quality processed ingredients, such as corn syrup and artificial coloring, and flavors.
When making your own fruit leathers using a dehydrator, it is easy to control the ingredients, minimize additives, and customize flavors to your liking.
In this article, I will guide you through the entire process of making fruit leathers in a dehydrator, from selecting the best fruits to storing your finished product.
Let’s get started…
NOTE: This article may contain affiliate links for your convenience. As an Amazon Associate, I earn from qualifying purchases at no extra cost to you. You can read the full disclosure policy here.
Kitchen Tools Recommended
- Dehydrator. After much research, I find I like this brand the best. This dehydrator is large, sturdy, and great fun to use to make healthy snacks.
- Blender. This powerful blender is my absolute go-to whenever I want to blend things up SMOOTH. I’ve owned mine for over ten years now, and it is still going strong. Well worth the investment.
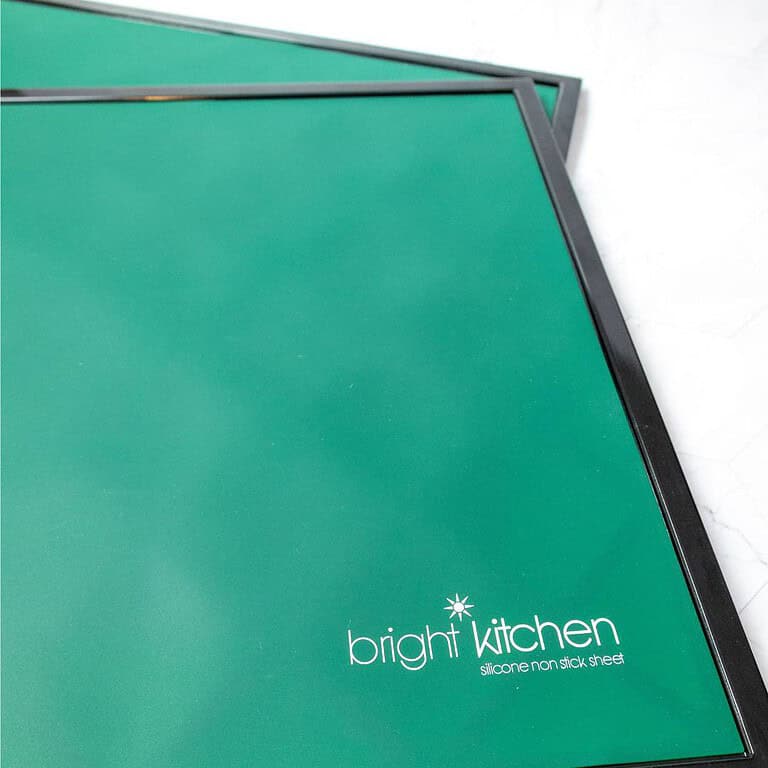
NOTE: If you do not have a blender, you can also use a powerful food processor, one that will blend the fruit up very, very smoothly. - Dehydrator sheets. These reusable silicone dehydrator sheets are perfect to use whenever you are working with wet ingredients. I love the quality of these, and the color is so pretty!
Ingredients To Make Fruit Leathers
Here I explain the best ingredients for making homemade fruit leathers in a dehydrator, as well as substitutions and optional ingredients to consider. You can get the exact measurements in the printable recipe card below.
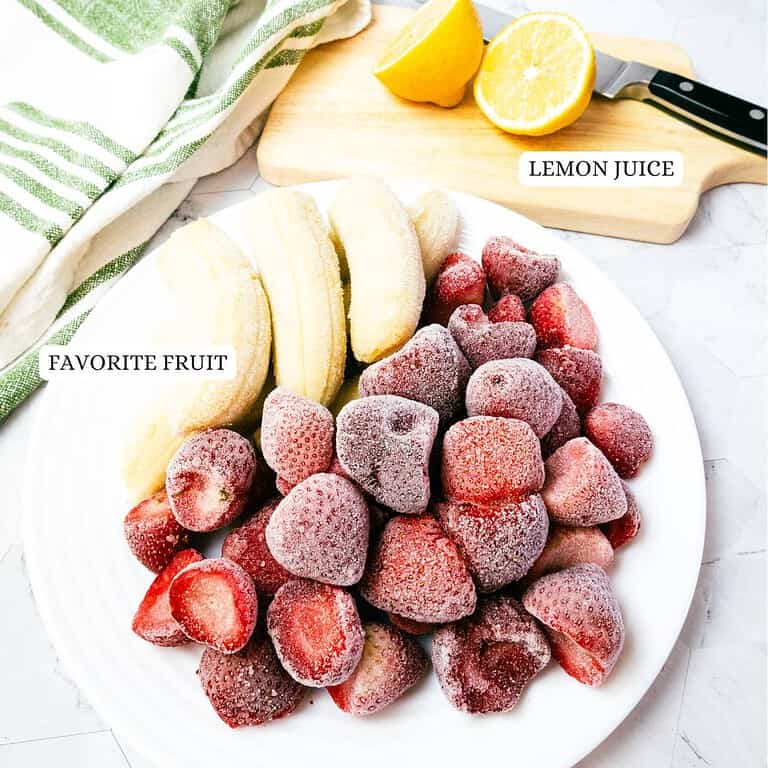
Fruit. Feel free to use any type of fruit, such as strawberries, raspberries, blueberries, or any other kind of berry of your liking. You can also use stone fruits such as peaches, plums, and nectarines, however, the pits must be removed, and, for best results, the skin removed.
PRO TIP: It is perfectly okay to use frozen instead of fresh fruit if you desire. Just make sure to slightly thaw and drain the extra liquid. This prevents the fruit mixture from taking forever to dry in the dehydrator.
Lemon juice. Although not strictly necessary, I include it because it keeps your dried fruit looking pretty!
PRO TIP: Without some kind of acid, like lemon juice, your fruit puree will oxidize and turn a slightly dull color. I’m not a fan. Store-bought fruit leathers mainly use preservatives for this, but we don’t want any of that in our homemade fruit roll-ups.
optional ingredients you may want to consider
Sweetener. If you’d like to sweeten up your fruit leathers, consider adding a touch of maple syrup or honey. You could also use a plant-based, sugar-free sweetener such as stevia or monk fruit if you desire.
Spices. Spices are always fun to add to the mix. Seasonings such as cinnamon, nutmeg, ginger, or a touch of clove would be perfect during the fall season or for the winter holidays.
Extracts. Pure extracts, such as vanilla or almond extract, add a nice touch to your fruit roll-ups and help to create a more distinct flavor.
How To Make Fruit Leathers: Step-by-Step Guide
Here I provide photos so you can see a step-by-step guide on how to make fruit leathers. For further details, including tips and techniques, please see the printable recipe card below.
STEP 1. Frozen Fruit Only. Gather the fruit you desire and place it in a large pan filled with enough water to submerge the fruit. Place the pan on the stove on medium heat, and allow the fruit to heat up just enough to defrost.
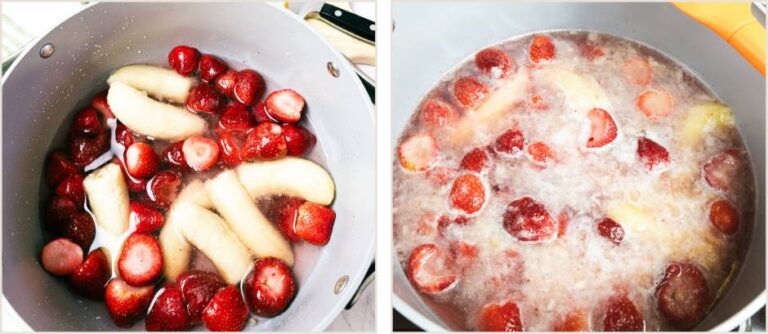
Once thawed, drain the fruit in a colander.
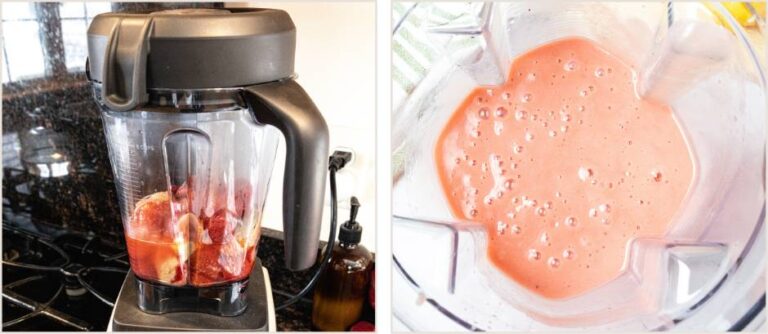
STEP 2. Place the fruit in a strong blender or food processor. Add the lemon juice and sweetener if desired. Blend until completely smooth.
STEP 3. Line a dehydrator tray with either a silicone mat or parchment paper. Pour the fruit mixture out onto the tray and spread it out to no more than 1/4 inch thick.
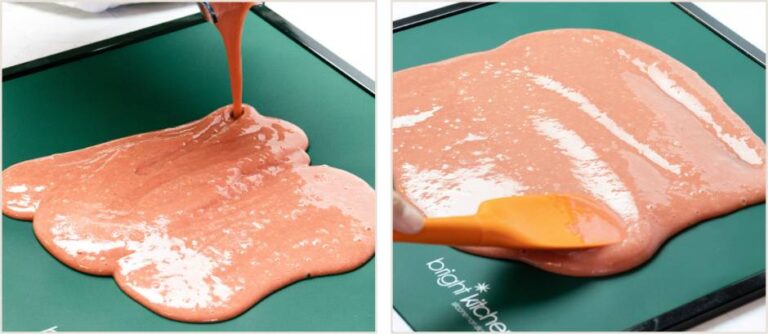
PRO TIP: It is easiest to use the back of a silicone spatula for spreading. Also, the edges will dry out quicker than the middle, so aim to make the edges ever so slightly thicker than the center. This will ensure a more equal drying time.
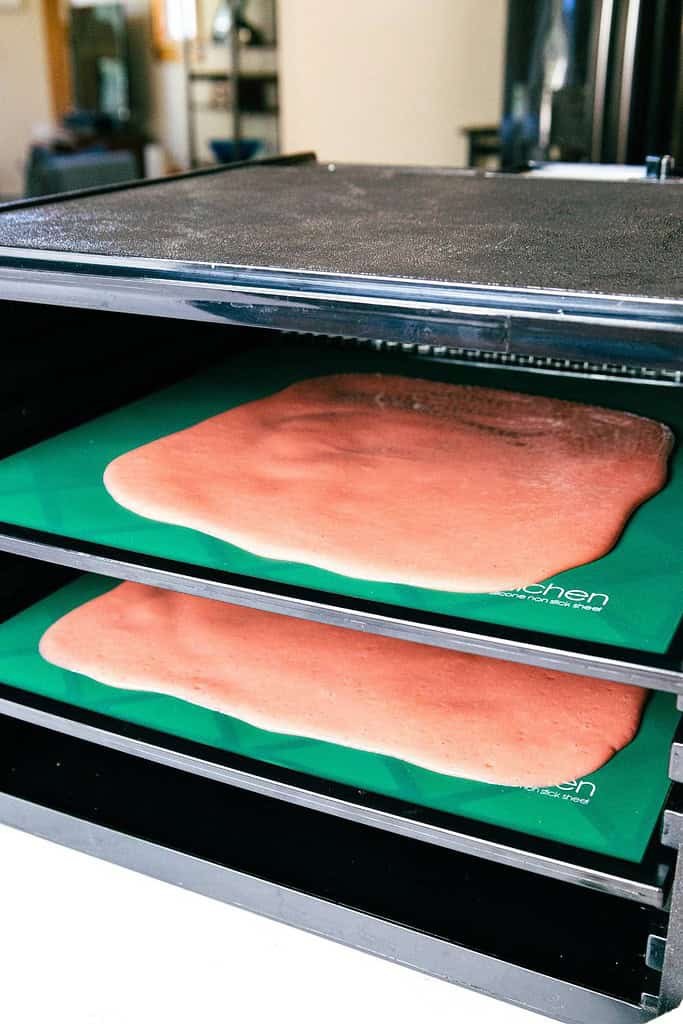
STEP 4: Place the dehydrator trays into the dehydrator. Cover and set the temperature to approximately 135° Fahrenheit. Let it dry for about 6-8 hours until the leather is smooth, dry, and shiny.
STEP 5: Once the fruit leathers are dry, take them out of the dehydrator. Flip the leather onto a large cutting board or a very clean kitchen counter.
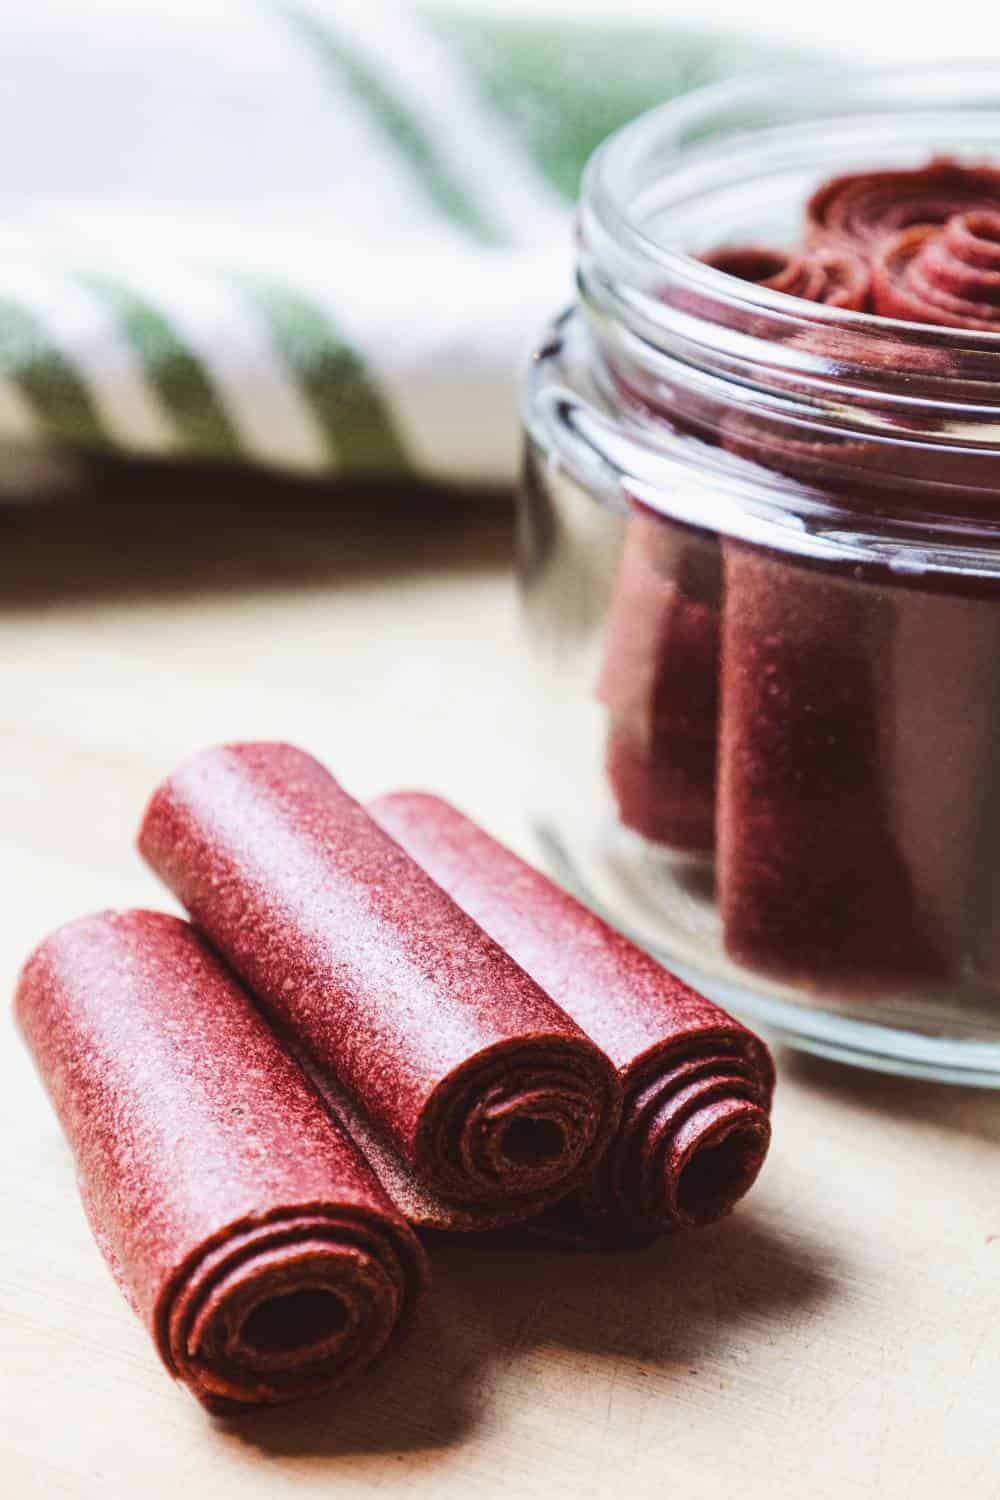
Using a ruler and a pizza cutter, cut the fruit leather into long, straight strips. Next, slowly roll up each strip and store each piece in a glass airtight container.
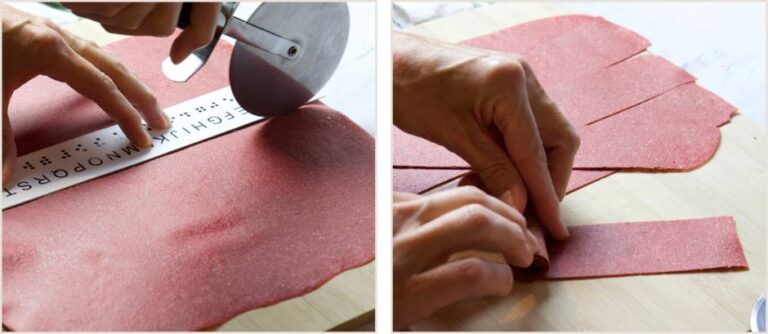
PRO TIP: To get fancy, place plastic wrap on top of the cutting board before you flip the fruit leather onto it. Then continue cutting and rolling. This way, you will have each piece already lined in plastic, so you can unroll it and eat it more readily.
If you do not use some kind of protection, like plastic wrap or parchment paper, the fruit will stick together while you are rolling. This isn’t necessarily a bad thing, but without a barrier in between, it will be difficult to unroll and you will have to eat the fruit leathers already rolled up, which actually is the way I like to eat them!
How To Store
These delicious fruit leathers store well in a glass airtight container on your kitchen countertop or in your pantry.
You can also wrap them individually in plastic wrap before storing them in a container. This makes it super easy to grab a few for your kid’s lunch boxes or to put in your own bag for a fun snack later in the day.
For longer storage, these fruit leathers store well in the freezer for up to about three months.
Recipe Tips For Success
If you are using fresh fruit, then there is no need to heat the fruit on the stove in water. This step is only if you are using frozen fruit.
Some recipes call for heating the fruit on the stove to soften, no matter if it’s fresh or frozen. However, whenever you cook food, it loses nutrients, so if it’s not strictly necessary, then I choose to avoid this step – unless you are using frozen fruit, of course.
You can also use a microwave oven instead of the stove to heat and defrost your frozen fruit.
Consider adding one tablespoon of honey or maple syrup for a sweeter fruit leather.
If you are looking for a sour fruit roll-up, avoid the sweetener and double the amount of lemon juice, which would be two tablespoons.
You can use lime or orange juice if you do not have lemon juice on hand, both are also acidic and will help preserve the color of your fruit roll-ups.
Every dehydrator is different, so the drying process and time may vary. On average, it can take approximately 6-8 hours at a low temperature, about 135°F. However, use this as a gauge only. The best test is when the fruit leathers turn smooth and shiny.
To speed up the drying process, after 4-5 hours of drying time, gently peel the fruit leathers off the silicone sheets and place them on the regular dehydrator trays. Place them back in the dehydrator for another hour or so. This step is not strictly necessary, but it does speed up the dehydration process.
Do not use wax paper in a dehydrator, or oven for that matter. It is best to use either the silicone sheets that are made for a dehydrator or sheets of parchment paper laid on top of the dehydrator trays.
Fruit Leathers: The Oven Method
You can make fruit leathers in the oven if you do not have a dehydrator, and it is quite easy.
Make the recipe as you would for the dehydrator, but then line a baking sheet, one that has sides, with a sheet of parchment paper.
Continue with the recipe by spreading, etc., and then place the baking sheet in an oven as low as possible – preferably 135°-145°F.
NOTE: Most ovens do not go this low, so set the oven as low as you can. If it is higher than 135°-145°F, then keep your oven door slightly ajar. This will help bring the temperature down so the fruit leathers do not overcook.
Once the fruit leathers are dry, smooth, and shiny, continue as you would using the dehydrator method.
5-Day Rejuvenation Diet & Guide
Jumpstart your health with the Rejuvenation Diet. A 5-day program designed to help you springboard into a healthy lifestyle.
Nutritious Homemade Fruit Leathers
At its core, fruit leathers are simply pureed fruit that has been spread thin and slowly dried until it forms a pliable sheet.
This process concentrates the natural sugars and flavors of the fruit, resulting in an intense and satisfying snack.
While store-bought versions are readily available, making your own allows you to experiment with unique fruit combinations and ensure that you are getting the most nutrition as possible.
The key to creating perfect fruit leather lies in the dehydration process. By using a dehydrator, you can precisely control the temperature and airflow, ensuring that your fruit leather dries evenly and retains its vibrant flavor and color.
This method also helps preserve the nutritional content of the fruits, making your homemade leather not just a treat, but a nutritious snack option for you to enjoy and share with your friends and family.
Additional Dehydrator Recipes To Enjoy
- How to Dry Cranberries: Sugar and Oil-Free Recipe
- Raw Dehydrator Granola Recipe: Vegan and Gluten Free
- Dried Food Tips: How Long Do Dehydrated Vegetables Last?
More Healthy Recipes and Wellness Support


Let’s Connect
I hope you enjoyed this article on how to make fruit leathers using a dehydrator. If you do make this recipe, I would love for you to let me know by commenting below. Oh, and a 5-star recipe rating is always helpful!
QUESTION. What kind of fruit leathers do you enjoy? Do you roll them up OR do you use cookie cutters to make fun shapes? Just curious…I’d love to know.
Also, please consider sharing this recipe with family and friends if you think they would enjoy it too.
Printable Recipe Card
Fruit Leathers: Making Fruit Roll-Ups In A Dehydrator
Ingredients
Equipment
Method
- Frozen Fruit Only. Gather the fruit you desire and place it in a large pan filled with enough water to submerge the fruit. Place the pan on the stove on medium heat, and allow the fruit to heat up just enough to defrost.Once thawed, drain the fruit in a colander.
- Place the fruit in a strong blender, or food processor. Add the lemon juice and sweetener if desired. Blend until completely smooth.
- Line a dehydrator tray with either a silicone mat or parchment paper. Pour the fruit mixture out onto the tray and spread it out to no more than 1/4 inch thick.PRO TIP: It is easiest to use the back of a silicone spatula for spreading. Also, the edges will dry out quicker than the middle, so aim to make the edges ever so slightly thicker than the center. This will ensure a more equal drying time.
- Place the dehydrator trays into the dehydrator. Cover, and set the temperature to approximately 135° Fahrenheit. Let it dry for about 6-8 hours – until the leathers are smooth, dry, and shiny.
- Once the fruit leathers are dry, take them out of the dehydrator. Flip the leather onto a large cutting board, or a very clean kitchen counter.Using a ruler and a pizza cutter, cut the fruit leather into long straight strips. Next, slowly roll up each strip and store each piece in a glass airtight container.PRO TIP: To get really fancy, place plastic wrap on top of the cutting board before you flip the fruit leather onto it. Then continue cutting and rolling. This way you will have each piece already lined in plastic, so you can unroll it and eat it more readily.If you do not use some kind of protection, like plastic wrap or parchment paper, the fruit will stick together while you are rolling. This isn’t necessarily a bad thing but without a barrier in between, it will be difficult to unroll and you will have to eat the fruit leathers already rolled up, which actually is the way I like to eat them!
Nutrition
Notes
- These delicious fruit leathers store well in a glass airtight container on your kitchen countertop or your pantry.
- You can also wrap them individually in plastic wrap before storing them in a container. This makes it super easy to grab a few for your kid’s lunch boxes or to put in your own bag for a fun snack later in the day.
- For longer storage, these fruit leathers store well in the freezer for up to about three months.
- If you are using fresh fruit, then there is no need to heat the fruit on the stove in water. This step is only if you are using frozen fruit.
- Some recipes call for heating the fruit on the stove to soften no matter if it’s fresh or frozen. However, whenever you cook food it loses nutrients, so if it’s not strictly necessary, then I choose to avoid this step – unless you are using frozen fruit of course.
- You can also use a microwave oven instead of the stove to heat and defrost your frozen fruit.
- If you are looking for a sweeter fruit leather, then definitely add about one tablespoon of either honey or maple syrup.
- If you are looking for a sour fruit roll-up, then avoid the sweetener and double the amount of lemon juice, which would be two tablespoons.
- If you don’t have lemon juice on hand, you can easily use lime juice or orange juice. Both are also acidic and will help preserve the color of your fruit roll-ups.
- Every dehydrator is different so the drying process and time may vary. On average it can take approximately 6-8 hours on a low temperature, about 135°F. However, use this as a gauge only. The best test is when the fruit leathers turn smooth and shiny.
- Do not use wax paper in a dehydrator, or oven for that matter. It is best to use either the silicone sheets that are made for a dehydrator or sheets of parchment paper laid on top of the dehydrator trays.